2 2脚手架和组件
5.脚手架
基于vue+vue-router单文件开发,可以完成小规模的页面的开发,但如果项目大+组件多+依赖多,开发起来就非常不方便。
此时,脚手架(vue cli - Vue Command Line Interface )是一个基于 Vue.js 进行快速开发的完整系统。
5.1 安装
- 第一步:安装node.js

=======如果想要更新node.js的版本=======

1.先查看本机node.js版本:
  node -v

2.清除node.js的cache:
  sudo npm cache clean -f

3.安装 n 工具,这个工具是专门用来管理node.js版本的,别怀疑这个工具的名字,是他是他就是他,他的名字就是 "n"
  sudo npm install -g n

4.安装最新版本的node.js
  sudo n stable

5.再次查看本机的node.js版本:
  node -v
- 第二步:关于npm

- 第三步:npm淘宝源,以后基于npm安装包就会快了(相当于豆瓣的pip源)
- 第四步:全局安装vue-cli
# 安装(最新版)
sudo npm install -g @vue/cli

# 安装(指定版本)
sudo npm install -g @vue/cli@4.5.14

# 卸载
sudo npm uninstall -g @vue/cli

5.2 创建项目
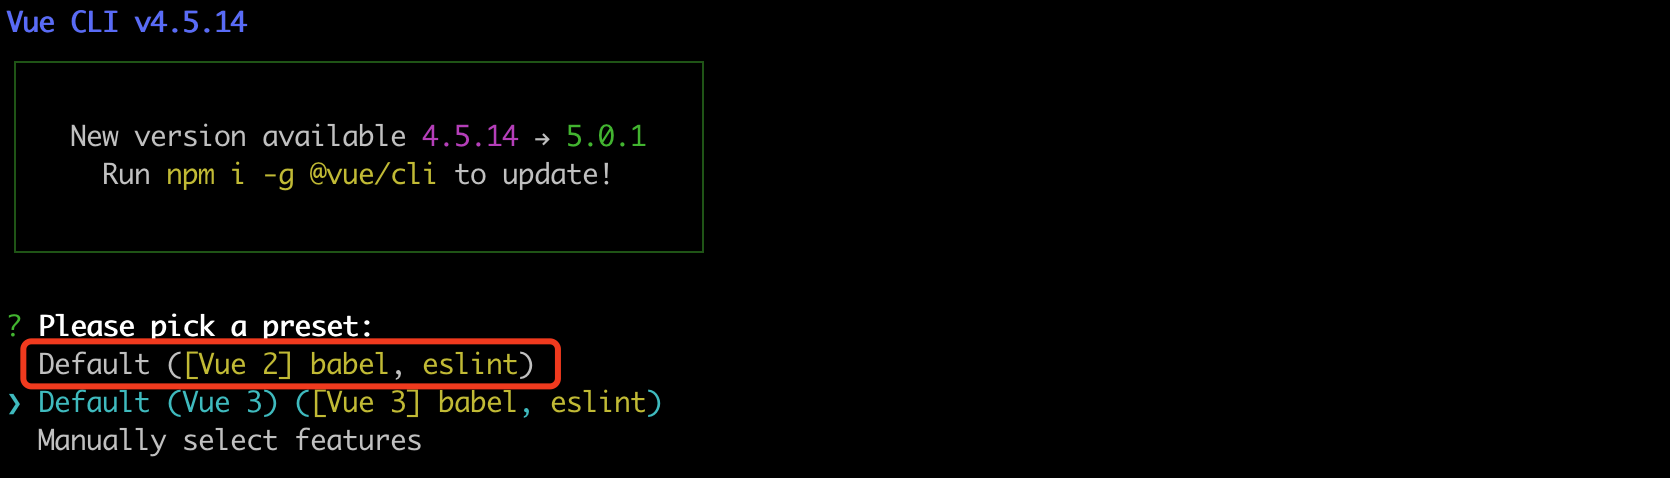
提示:babel是一个将ES6语法转化成ES5的工具,eslint是做语法检查。

a few moments later...
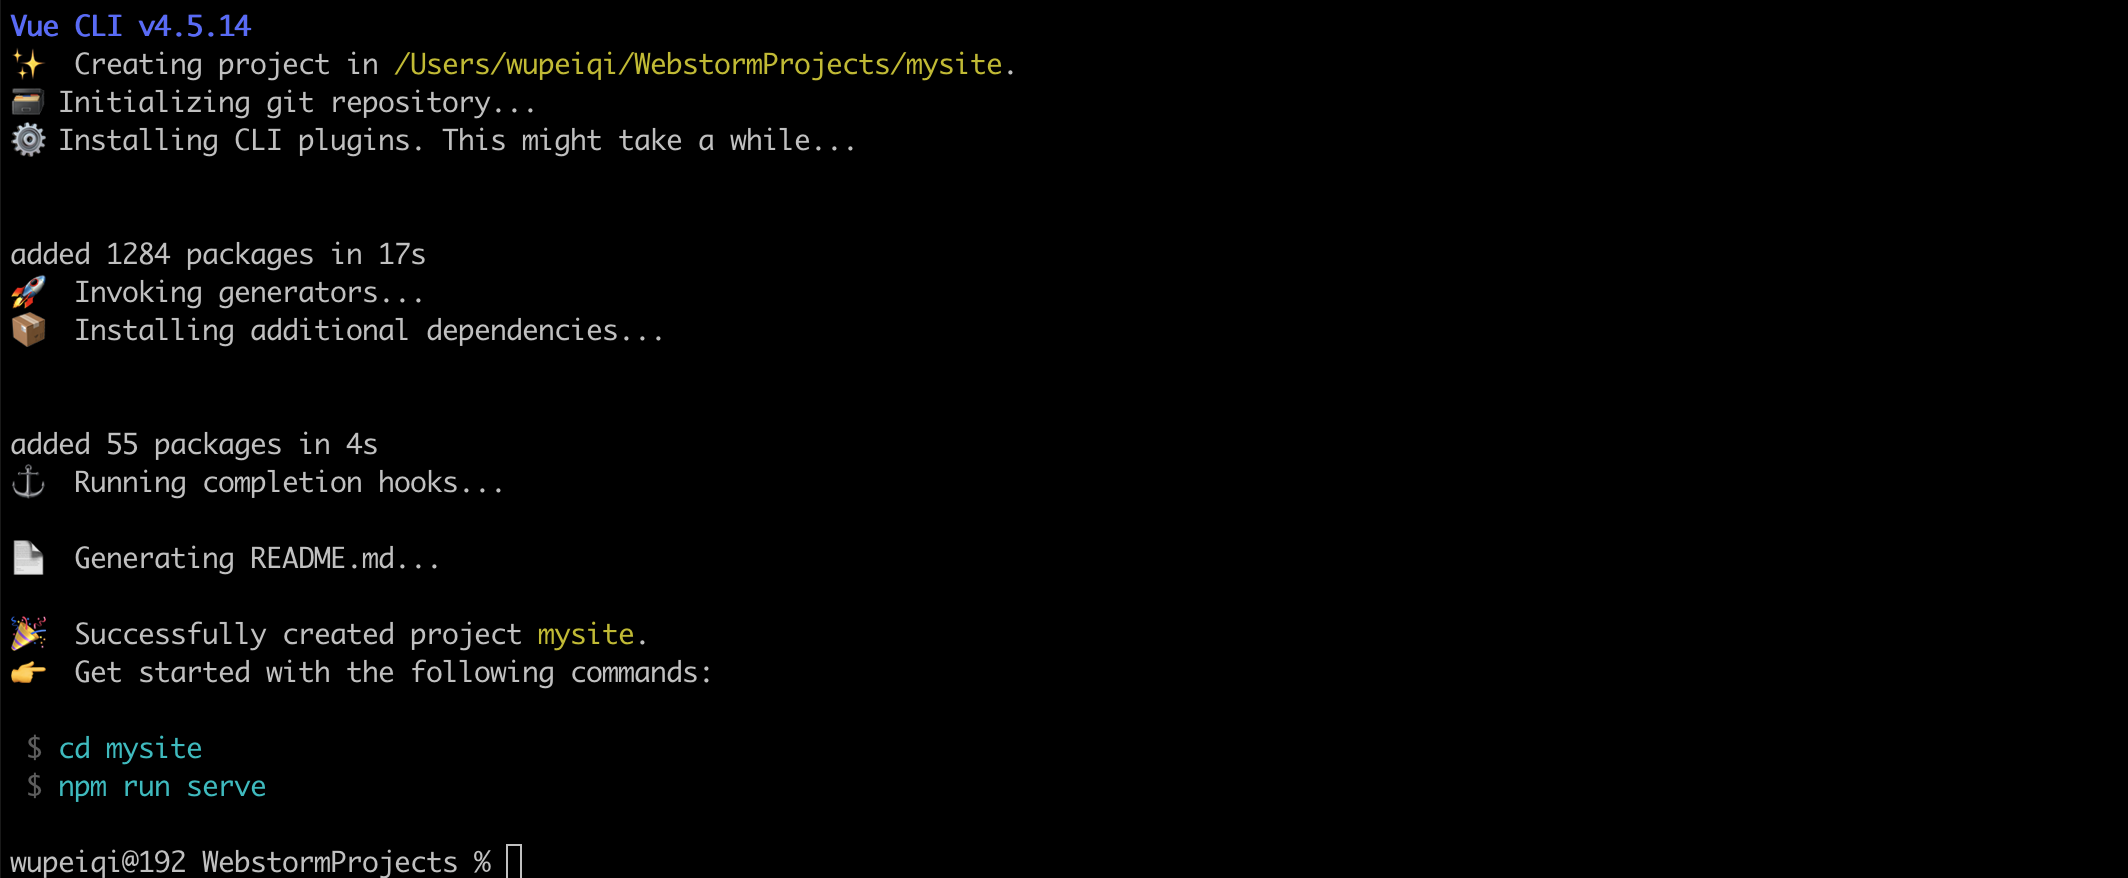
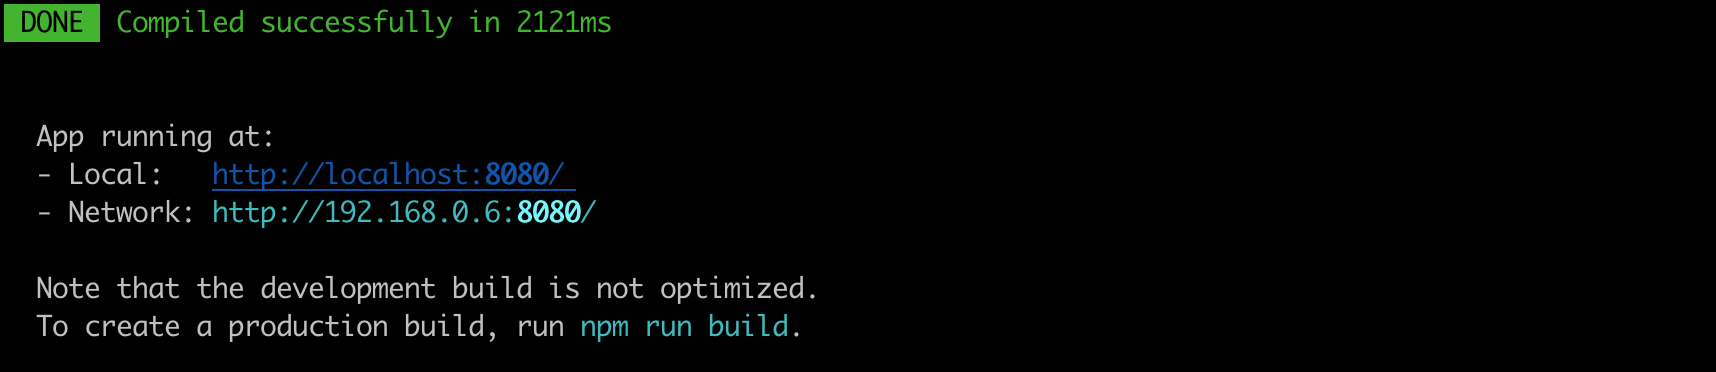
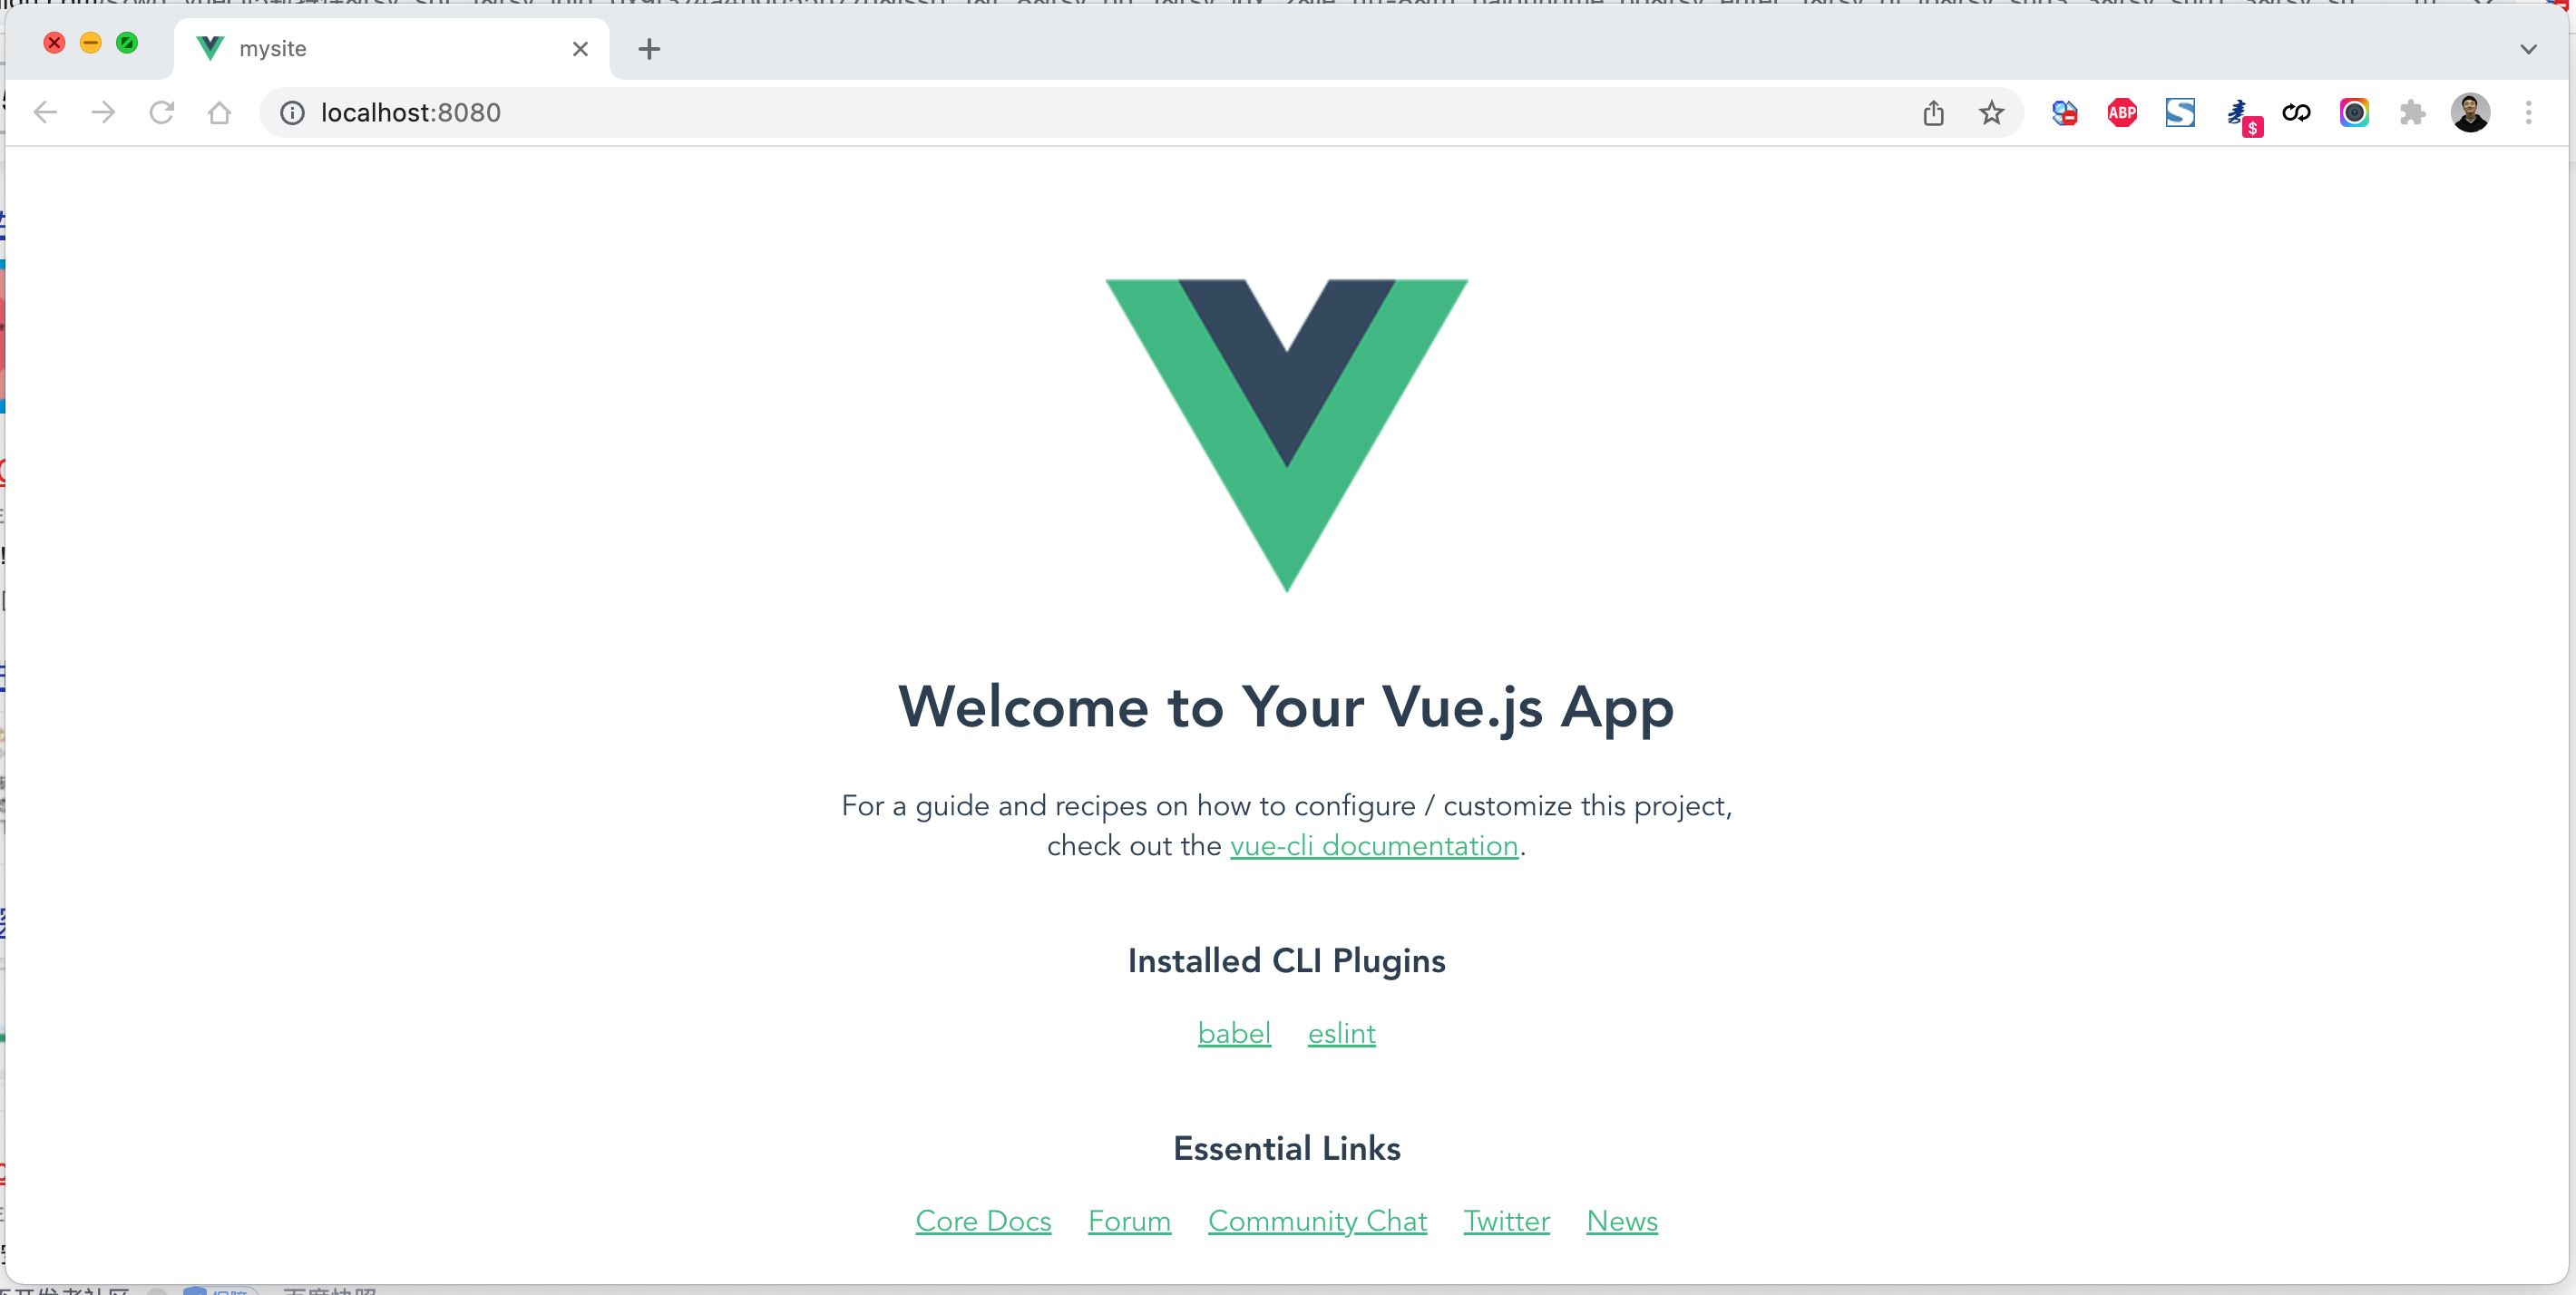
按照提示执行如下命令,脚手架就会给我们大家一个Web服务去运行编写的vue项目(便于开发测试)。
5.3 编译部署
项目创建完,脚手架会默认会生成如下文件(包含项目依赖、配置文件、默认代码)。
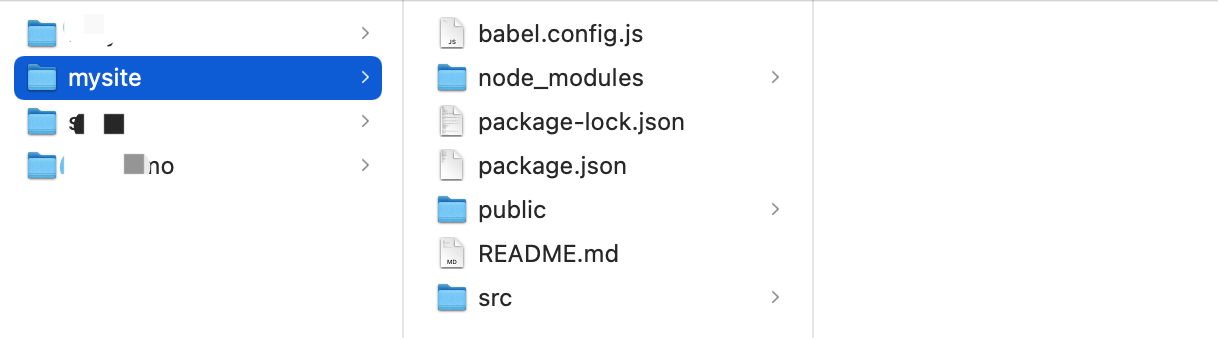
如果以后项目开发完毕,想要进行项目部署,是不需要这些文件的,执行命令:
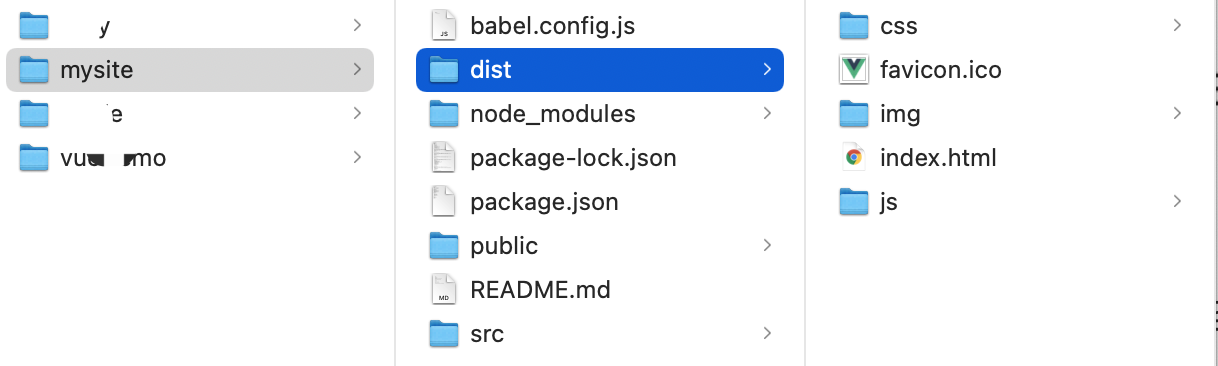
build会将项目中的依赖和代码自动编译成HTML、CSS、JavaScript代码,后续只需要将此代码上传至服务器部署即可。
5.4 目录结构
- babel.config.js      babel是ES6转换ES5的组件,这是他所需的配置文件(一般不需要动)。
- package.json         项目所需的包的版本信息。
- package-lock.json    保存项目所需的包细节以及包的依赖等信息。
- node-modules         项目安装依赖包的文件保存的地方。例如:npm install axios
                       axios包会保存在此目录、信息也会写在 package.json、package-lock.json中
- src
    - main.js          项目的启动 npm run serve ,用户访问时程序的入门。
    - App.vue          主组件
    - components       子组件
    - assets           静态文件(自己的静态文件,会被压缩和合并)
- public              【此目录下的文件直接被复制到dist/目录下,一般放不动的数据,引入第三方】
    - index.html       主HTML文件(模板引擎)
    - favicon.icon     图标
- README.md            项目说明文档
本质上,其实就是将原来的代码做了拆分来进行开发,开发完毕之后再编译整合起来。
<!DOCTYPE html>
<html lang="en">
<head>
    <meta charset="UTF-8">
    <title>Title</title>
    <script src="https://cdn.jsdelivr.net/npm/vue@2/dist/vue.js"></script>
</head>
<body>

<div id="app">
    <h1>欢迎学习Vue.js</h1>
    <div>我叫{{name}},微信{{wechat}}</div>
</div>

<script>


    var app = new Vue({
        el: '#app',
        data: {
            name: '武沛齐',
            wechat: 'wupeiqi888'
        },
        methods: {
            clickMe: function () {
                this.name = "alex";
                this.wechat = "wupeiqi666";
            }
        }
    })
</script>
</body>
</html>
5.5 快速上手
5.5.1 axios组件
安装:
导入:
import Vue from 'vue'
import axios from 'axios'
import VueAxios from 'vue-axios'

Vue.use(VueAxios, axios)
使用:
Vue.axios.get(api).then((response) => {
  console.log(response.data)
})

this.axios.get(api).then((response) => {
  console.log(response.data)
})

this.$http.get(api).then((response) => {
  console.log(response.data)
})
5.5.2 vue-router组件
安装:
引入:
// router/index.js

import Vue from 'vue'
import VueRouter from 'vue-router'


import Home from '../components/Home'


Vue.use(VueRouter)

const router = new VueRouter({
    routes: [
        {
            path: '/home',
            name: "Home",
            component: Home
        },
    ]
})

export default router
// main.js
import Vue from 'vue'
import axios from 'axios'
import VueAxios from 'vue-axios'


import App from './App.vue'

// 导入router文件
import router from "./router"


Vue.use(VueAxios, axios)

Vue.config.productionTip = true


new Vue({
    router: router,
    render: h => h(App),
}).$mount('#app')
使用:App.vue
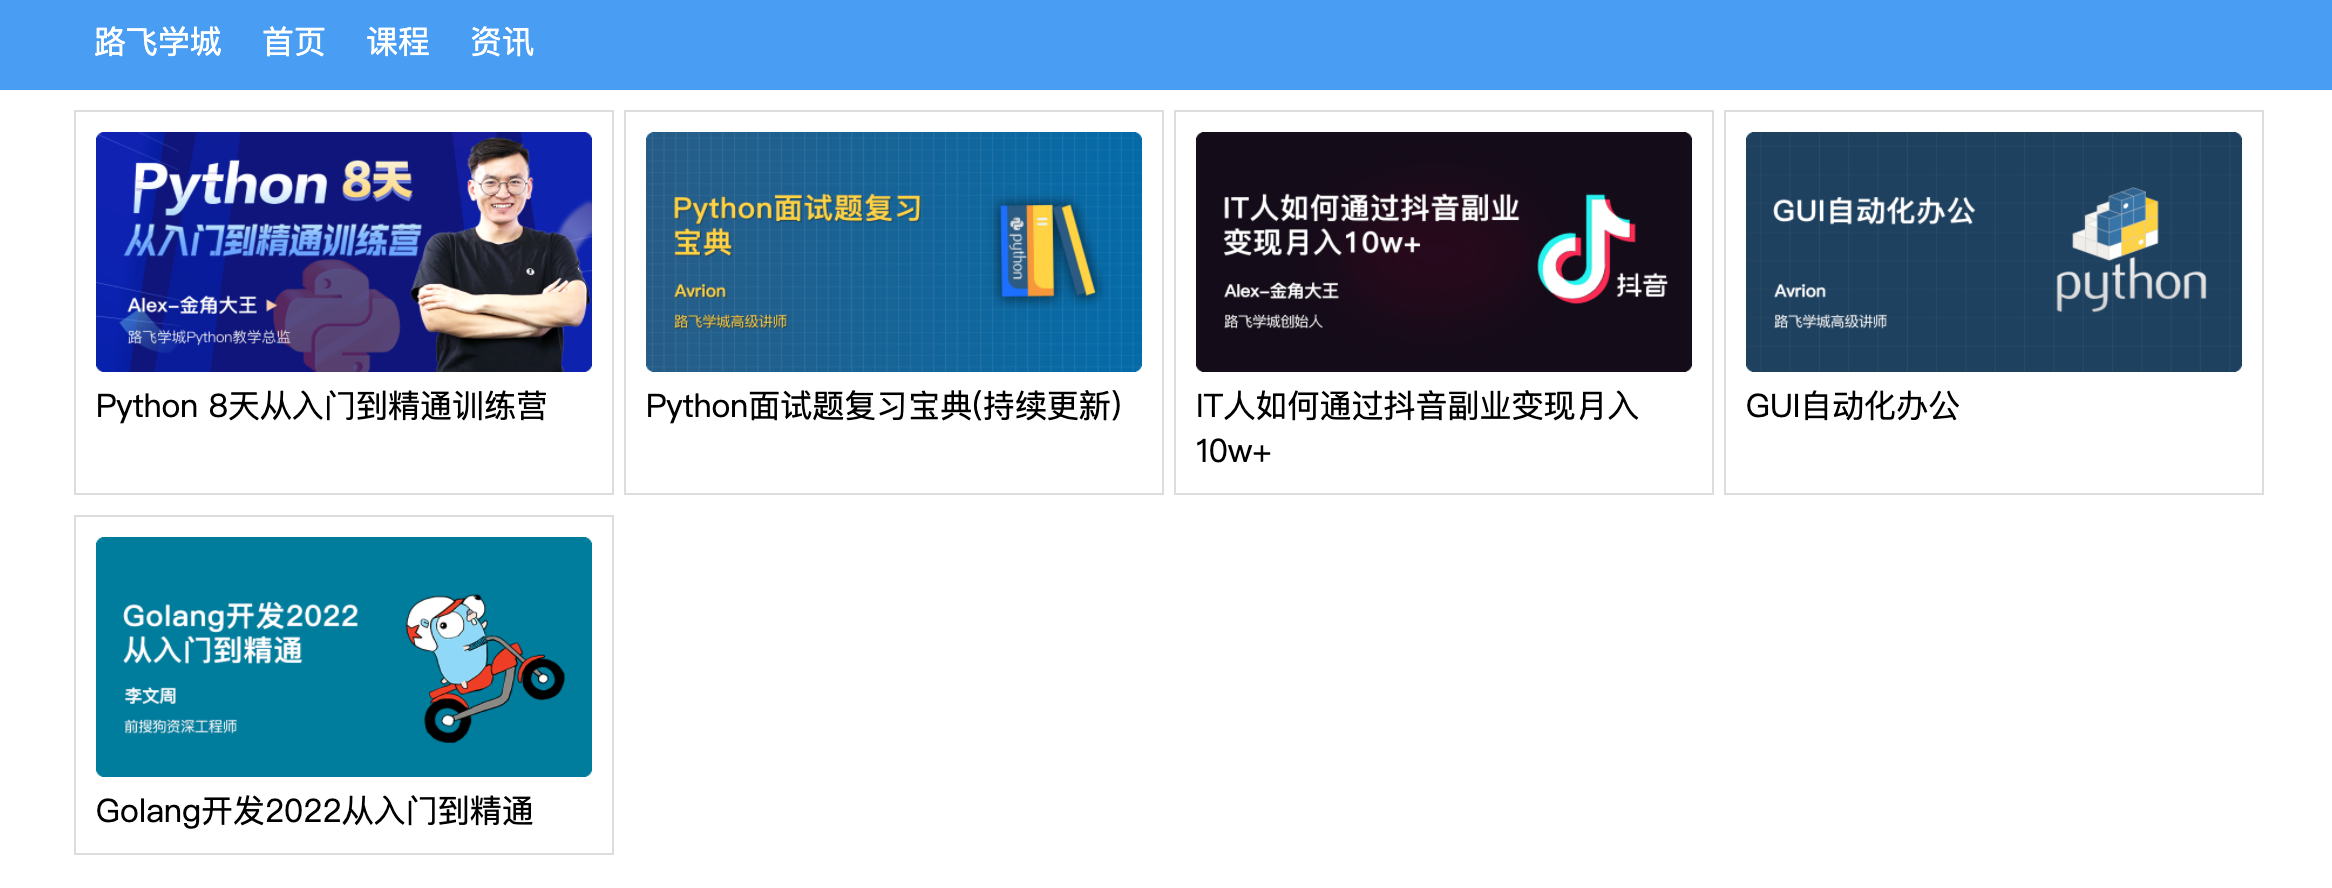
5.5.3 案例:路飞学城
基于vue-cli快速开发:路飞学城(第一版)
5.6 线上部署
- 第一步:编译
- 第二步:将编译后的代码dist文件上传到服务器(阿里云、腾讯云)
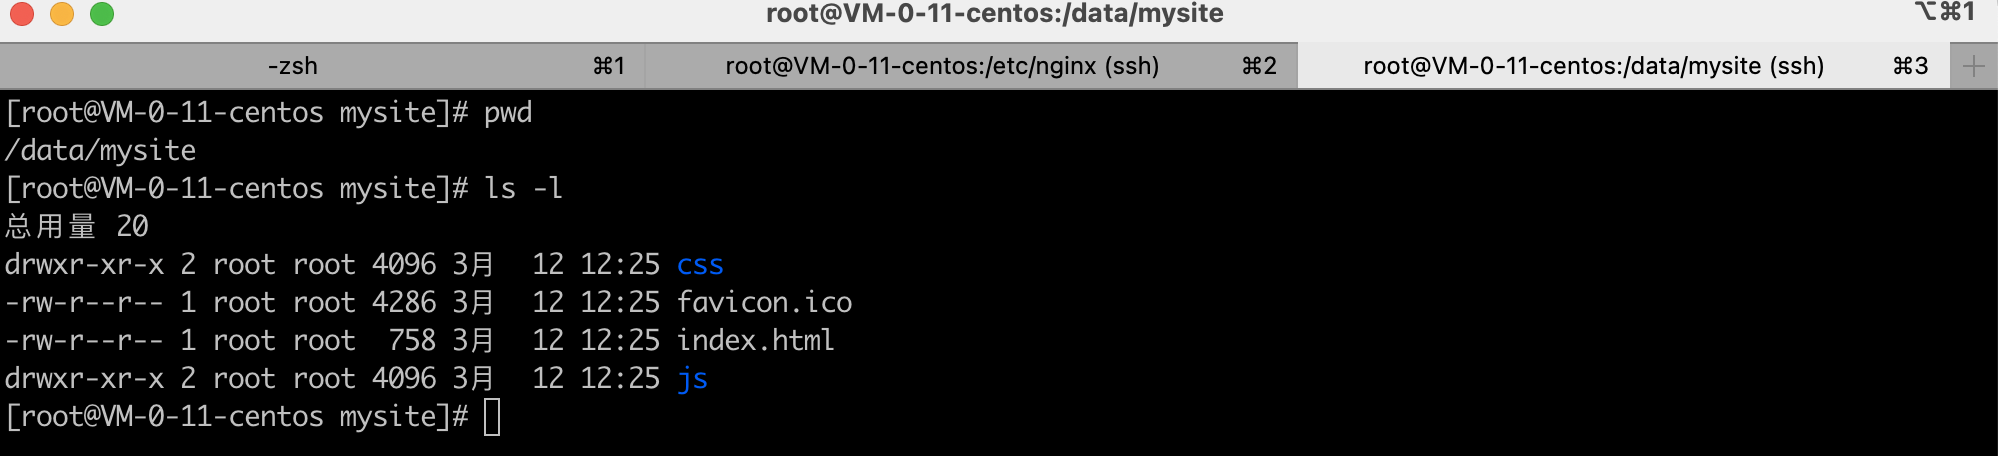
- 第三步:安装nginx + 配置 + 启动
vim /etc/nginx/nginx.conf
user nginx;
worker_processes auto;
error_log /var/log/nginx/error.log;
pid /run/nginx.pid;

# Load dynamic modules. See /usr/share/doc/nginx/README.dynamic.
include /usr/share/nginx/modules/*.conf;

events {
    worker_connections 1024;
}

http {
    log_format  main  '$remote_addr - $remote_user [$time_local] "$request" '
                      '$status $body_bytes_sent "$http_referer" '
                      '"$http_user_agent" "$http_x_forwarded_for"';

    access_log  /var/log/nginx/access.log  main;

    sendfile            on;
    tcp_nopush          on;
    tcp_nodelay         on;
    keepalive_timeout   65;
    types_hash_max_size 4096;

    include             /etc/nginx/mime.types;
    default_type        application/octet-stream;

    include /etc/nginx/conf.d/*.conf;

    server {
        listen       80;
        listen       [::]:80;
        server_name  _;
        # 项目目录
        root         /data/mysite;

        # Load configuration files for the default server block.
        include /etc/nginx/default.d/*.conf;

        error_page 404 /404.html;
        location = /404.html {
        }

        error_page 500 502 503 504 /50x.html;
        location = /50x.html {
        }
    }


}
- 第四步:访问
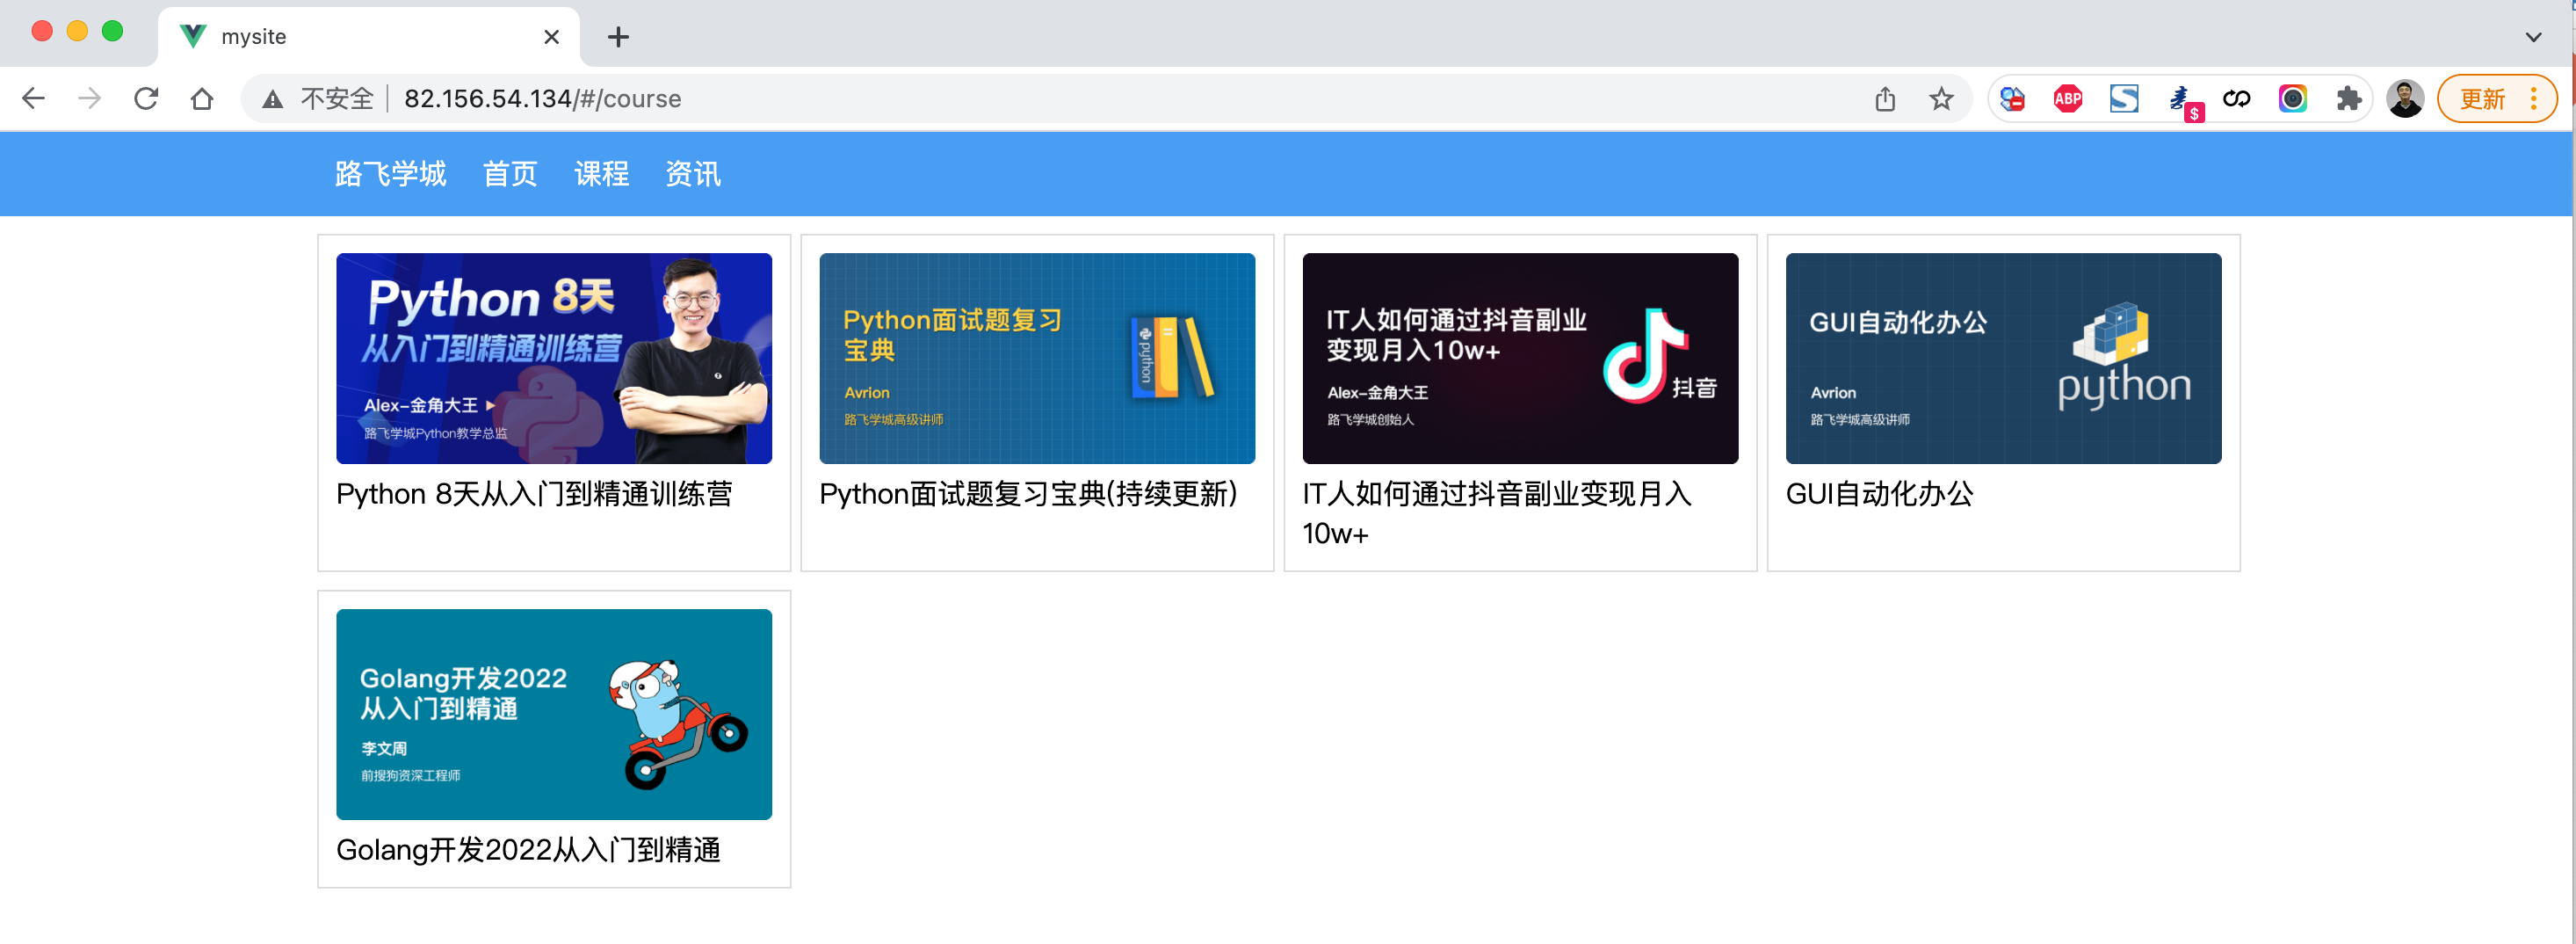
6.vuex
Vuex 是一个专为 Vue.js 应用程序开发的状态管理模式。它采用集中式存储管理应用的所有组件的状态,并以相应的规则保证状态以一种可预测的方式发生变化。
说人话:将组件中需要共享的数据交给vuex来帮我们进行管理,例如:用户登录状态、加入购物车。

6.1 案例:登录
- main.js
import Vue from 'vue'
import App from './App.vue'
import router from "./router"
import store from "./store"

Vue.config.productionTip = false

new Vue({
    router: router,
    store: store,
    render: h => h(App),
}).$mount('#app')
- App.vue
<template>
    <div id="app">
        <div class="menu">
            <div class="container">
                <router-link to="/home">首页</router-link>
                <router-link to="/course">课程</router-link>

                <div style="float: right">
                    <a v-if="this.$store.state.isLogin">
                        {{this.$store.state.userInfo.username}}
                    </a>
                    <router-link v-else to="/login">登录</router-link>

                </div>
            </div>
        </div>
        <div class="container">
            <router-view></router-view>
        </div>
    </div>
</template>
<script>
    export default {
        name: 'App',
        data() {
            return {}
        },
        components: {},
    }
</script>

<style>
    body {
        margin: 0;
    }
    .container {
        width: 1100px;
        margin: 0 auto;
    }
    .menu {
        height: 48px;
        background-color: #499ef3;
        line-height: 48px;

    }
    .menu a {
        color: white;
        text-decoration: none;
        padding: 0 10px;
    }
</style>
- store/index.js
import Vue from 'vue'
import Vuex from 'vuex'

Vue.use(Vuex)


export default new Vuex.Store({
    state: {
        isLogin: false, //是否登录
        userInfo: null //用户信息
    },
    mutations: {
        login: function (state, info) {
            state.userInfo = info;
            state.isLogin = true;
        },

    },
    actions: {}
})
- router/index.js
// router/index.js

import Vue from 'vue'
import VueRouter from 'vue-router'


import Home from '../components/Home'
import Course from '../components/Course'
import Login from '../components/Login'


Vue.use(VueRouter)

const router = new VueRouter({
    routes: [
        {
            path: '/home',
            name: "Home",
            component: Home
        },
        {
            path: '/course',
            name: "Course",
            component: Course
        },
        {
            path: '/login',
            name: "Login",
            component: Login
        },
    ]
})

export default router
- components/Login.vue
<template>
    <div>
        <input type="text" v-model="info.username" placeholder="用户名">
        <input type="password" v-model="info.password" placeholder="密码">
        <input type="button" value="登录" @click="doLogin"/>
    </div>
</template>

<script>
    export default {
        name: "Login",
        data() {
            return {
                info: {
                    username: "",
                    password: ""
                }
            }
        },
        methods: {
            doLogin: function () {
                // 1.用户登录
                this.$store.commit('login', this.info);
                // 2.登录成功修改状态
                this.$router.push({name: 'Home'});
            }
        }
    }
</script>

<style scoped>

</style>
6.2 关于computed属性
在vue的组件中有一个computed属性(计算属性),监听关联的数据,如果发生变化则重新计算并显示。
<template>
    <div>
        <h1>主页 {{v1}} {{ v2}}</h1>

        <div>总数:{{totalData}}</div>
        <input type="button" value="点我" @click="addData"/>
    </div>
</template>

<script>
    export default {
        name: "Home",
        data() {
            return {
                v1: 123,
                v2: 456
            }
        },
        computed: {
            totalData: {
                get() {
                    let data = this.v1 + this.v2;
                    return data + 1000;
                },
                set(value) {
                    this.v1 = value;
                }
            }
        },
        methods: {
            addData() {
                this.totalData = 999;
                // this.v2 = 1000;
            }
        }
    }
</script>

<style scoped>

</style>
所以,上述案例也可以用computed属性来实现,例如:App.vue改成:
<template>
    <div id="app">
        <div class="menu">
            <div class="container">
                <router-link to="/home">首页</router-link>
                <router-link to="/course">课程</router-link>

                <div style="float: right">
                    <a v-if="userState">
                        {{userName}}
                    </a>
                    <router-link v-else to="/login">登录</router-link>

                </div>
            </div>
        </div>
        <div class="container">
            <router-view></router-view>
        </div>
    </div>
</template>

<script>

    export default {
        name: 'App',
        data() {
            return {}
        },
        computed: {
            userState: {
                get() {
                    return this.$store.state.isLogin;
                }
            },
            userName() {
                return this.$store.state.userInfo.username;
            },

        },
        components: {},
    }
</script>

<style>
    body {
        margin: 0;
    }

    .container {
        width: 1100px;
        margin: 0 auto;
    }

    .menu {
        height: 48px;
        background-color: #499ef3;
        line-height: 48px;

    }

    .menu a {
        color: white;
        text-decoration: none;
        padding: 0 10px;
    }


</style>
6.3 案例:购物车
6.4 关于Action
Action 类似于 mutation,不同在于:
- Action 提交的是 mutation,而不是直接变更状态。
- Action 可以包含任意异步操作。
代码示例:
const store = createStore({
  state: {
    count: 0
  },
  mutations: {
    increment (state) {
      state.count+=1;
    }
  },
  actions: {
    increment (context) {
        // 触发mutations
        context.commit('increment')
    }
  }
})
在组件中如果要触发,则应该执行:
这就有点像脱裤子放屁,意义何在呢? 当有异步操作时,应该使用action、而不是mutation,例如:
import Vue from 'vue'
import Vuex from 'vuex'

Vue.use(Vuex)


export default new Vuex.Store({
    state: {
        isLogin: false, //是否登录
        userInfo: null, //用户信息
        carNumber: 0,
        xxxxx: 10
    },
    mutations: {
        login: function (state, info) {
            state.userInfo = info;
            state.isLogin = true;
        },
        addCar: function (state) {
            state.carNumber += 1;
        },
        fetchAsync: function (state) {
            // ajax
            setTimeout(function () {
                state.xxxxx += 1;
            }, 1000);
        }

    },
    actions: {}
})
从效果上看是没有问题的,但是通过开发者工具就会发现,监测到的state的数据不准确。
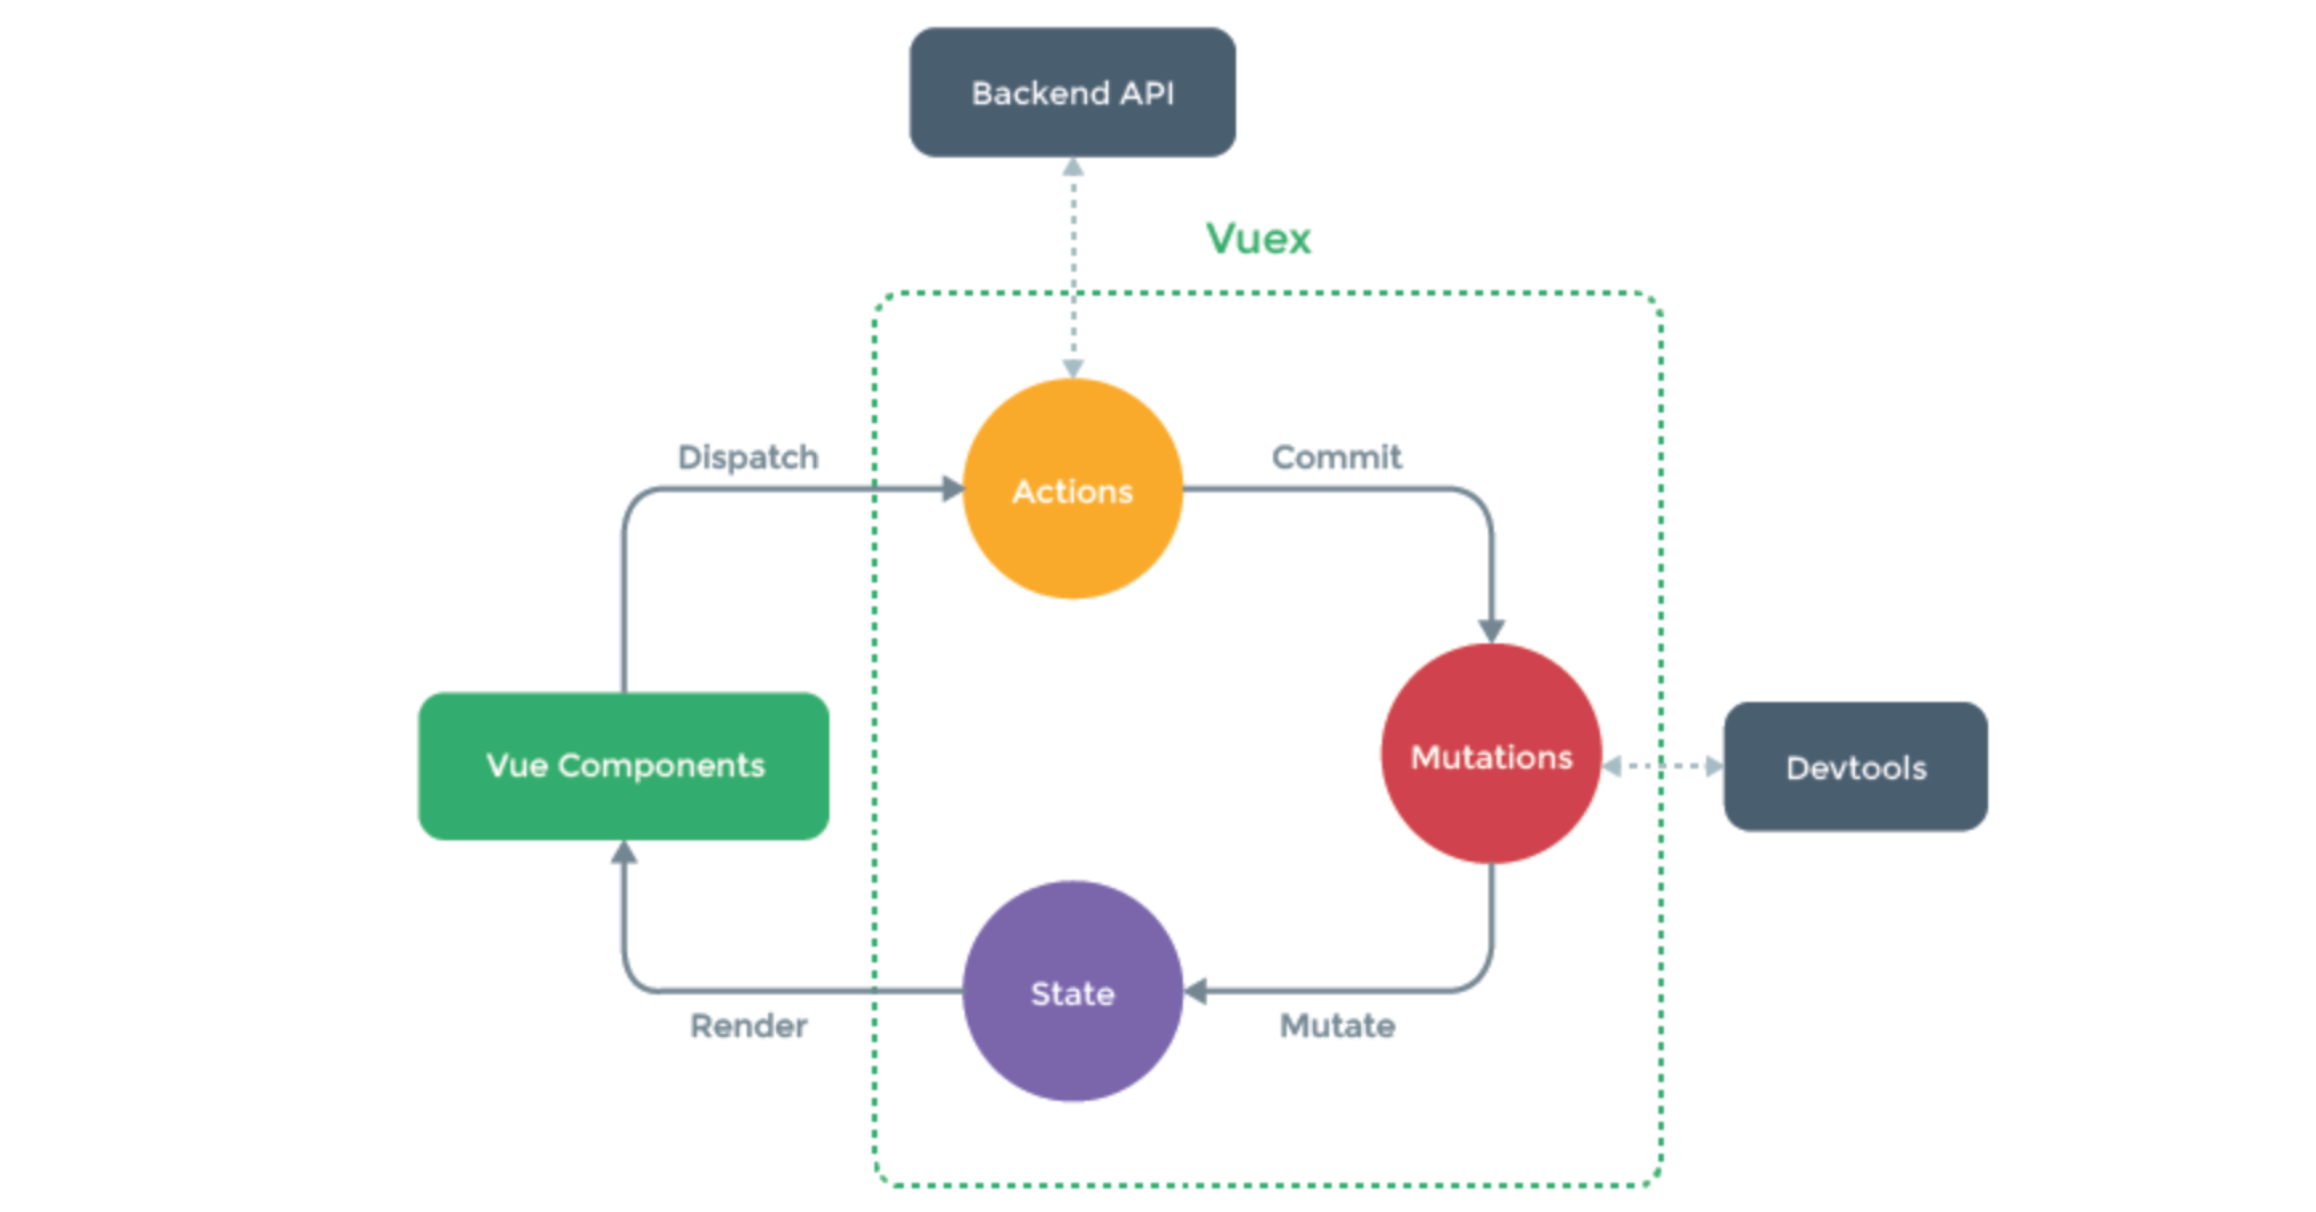
所以,这种情况可以选择用Action。
import Vue from 'vue'
import Vuex from 'vuex'

Vue.use(Vuex)


export default new Vuex.Store({
    state: {
        isLogin: false, //是否登录
        userInfo: null, //用户信息
        carNumber: 0,
        xxxxx: 10
    },
    mutations: {
        login: function (state, info) {
            state.userInfo = info;
            state.isLogin = true;
        },
        addCar: function (state) {
            state.carNumber += 1;
        },
        fetchAsync: function (state,data) {
            state.xxxxx += 1;
            console.log(data);
        }

    },
    actions: {
        fetchAsync: function (context,data) {
            setTimeout(function () {
                context.commit("fetchAsync",data);
            }, 1000);
        }
    }
})
再触发时,调用:
7.flex布局
在CSS3中flex可以非常便捷的可以帮助我们实现对页面的布局。
- 传统的页面布局,基于div+float来实现。
- flex可以快速实现页面的布局(很方便)。
关于flex布局你必须要了解的有一下几点:
7.1 容器
7.1.1 flex布局
在容器元素上应用
<div class="menu">
    <div class="item">112</div>
    <div class="item">113</div>
</div>

<style>
    .menu{
        border: 1px solid red;
        width: 500px;
        display: flex;         // 表示flex布局
    }
</style>
7.1.2 元素的方向(主轴和副轴)
<div class="menu">
    <div class="item">112</div>
    <div class="item">113</div>
</div>
<style>
    .menu{
        border: 1px solid red;
        width: 500px;

        display: flex;         // 表示flex布局
        flex-direction: row;   // 主轴是横向,副轴是纵向。
    }
</style>
7.1.3 元素排列方式
示例1: 
<div class="menu">
    <div class="item">11</div>
    <div class="item">112</div>
    <div class="item">112</div>
</div>
<style>
    .menu {
        width: 500px;
        border: 1px solid red;
        display: flex;

        flex-direction: row;
        justify-content: flex-start;     /* 主轴=横向,横向从左开始 */
        justify-content: flex-end;       /* 主轴=横向,横向从右开始 */
        justify-content: space-between;   /* 主轴=横向,左右定格,中间元素等分空白 */
        justify-content: space-around;   /* 主轴=横向,所有元素等分空白 */
        justify-content: space-evenly;   /* 主轴=横向,元素间距一样 */
    }

    .item {
        border: 1px solid green;
        padding: 5px 50px;
        height: 50px;
        width: 40px;
    }
</style>
示例2: 
<div class="menu">
    <div class="item">11</div>
    <div class="item">112</div>
    <div class="item">112</div>
</div>
<style>
    .menu {
        width: 500px;
        height: 300px;
        border: 1px solid red;
        display: flex;

        flex-direction: row;
        justify-content: flex-start;     /* 主轴=横向,横向从左开始 */
        justify-content: flex-end;       /* 主轴=横向,横向从右开始 */
        justify-content: space-between;   /* 主轴=横向,左右定格,中间元素等分空白 */
        justify-content: space-around;   /* 主轴=横向,所有元素等分空白 */
        justify-content: space-evenly;   /* 主轴=横向,元素间距一样 */

        align-items: center;             /* 副轴=纵向,元素居中*/
        align-items: flex-start;         /* 副轴=纵向,元素顶部*/
        align-items: flex-end;           /* 副轴=纵向,元素底部*/
    }

    .item {
        border: 1px solid green;
        padding: 5px 50px;
        height: 50px;
        width: 40px;
    }
</style>
7.1.4 换行
flex-wrap: nowrap;元素超过容器,不换行flex-wrap: wrap;元素超过容器,换行
示例1:不换行

<div class="menu">
    <div class="item">11</div>
    <div class="item">112</div>
    <div class="item">112</div>
    <div class="item">112</div>
    <div class="item">112</div>
</div>
<style>
    .menu {
        width: 500px;
        height: 200px;
        border: 1px solid red;
        display: flex;

        flex-direction: row;
        justify-content: space-evenly;   /* 主轴=横向,元素间距一样 */
        align-items: flex-start;         /* 副轴=纵向,元素顶部*/

        flex-wrap: nowrap;

    }

    .item {
        border: 1px solid green;
        padding: 5px 50px;
        height: 50px;
        width: 40px;
    }
</style>
示例2:换行

<div class="menu">
    <div class="item">111</div>
    <div class="item">112</div>
    <div class="item">112</div>
    <div class="item">112</div>
    <div class="item">112</div>

</div>

<style>
    body{
        margin: 0;
    }
    .menu {
        width: 500px;
        height: 200px;
        border: 1px solid red;
        display: flex;

        flex-direction: row;
        justify-content: space-evenly;   /* 主轴=横向,元素间距一样 */
        align-items: flex-start;         /* 副轴=纵向,元素顶部*/

        flex-wrap: wrap;

    }

    .item {
        border: 1px solid green;
        padding: 5px 50px;
        height: 50px;
        width: 40px;
    }
</style>
7.1.5 多行对齐方式
align-content用于控制多行元素的对齐方式,如果元素只有一行则不会起作用;默认stretch,即在元素没设置高度,或高度为auto情况下让元素填满整个容器。
7.2 元素
7.2.1 顺序
order,默认0,用于决定项目排列顺序,数值越小,项目排列越靠前。

<div class="father">
    <div class="son" style="order: 2">11</div>
    <div class="son" style="order: 0">22</div>
    <div class="son" style="order: 1">33</div>
</div>

<style scoped>
    .father {
        border: 1px solid red;
        width: 500px;
        height: 300px;
        display: flex;
        flex-direction: row;
        justify-content: flex-start;
    }

    .father .son {
        border: 1px solid saddlebrown;
        width: 20px;
        height: 18px;
    }
</style>
7.2.2 剩余空间
flex-grow,默认0,用于决定项目在有剩余空间的情况下是否放大,默认不放大;

<div class="father">
    <div class="son">11</div>
    <div class="son" style="flex-grow: 1">22</div>
    <div class="son" style="flex-grow: 1">33</div>
</div>
案例:flex页面布局

<template>
    <div>
        <div class="row1">
            <div class="company"></div>
            <div class="pic"></div>
            <div class="pic"></div>
            <div class="pic"></div>
        </div>
        <div class="row2">
            <div class="title">
                <div>手机</div>
                <div>查看更多</div>
            </div>
            <div class="pic-list">
                <div class="big"></div>
                <div class="right-list">
                    <div class="group">
                        <div class="phone"></div>
                        <div class="phone"></div>
                        <div class="phone"></div>
                        <div class="phone"></div>
                    </div>
                    <div class="group">
                        <div class="phone"></div>
                        <div class="phone"></div>
                        <div class="phone"></div>
                        <div class="phone"></div>
                    </div>

                </div>
            </div>
        </div>

        <div class="course-list">
            <div class="item"></div>
            <div class="item"></div>
            <div class="item"></div>
            <div class="item"></div>
            <div class="item"></div>

        </div>
    </div>
</template>

<script>
    export default {
        name: "Mi"
    }
</script>

<style scoped>
    .row1 {
        display: flex;
        flex-direction: row;
        justify-content: space-between;
    }

    .row1 .company {
        width: 210px;
        height: 180px;
        background-color: saddlebrown;
    }

    .row1 .pic {
        width: 266px;
        height: 180px;
        background-color: cadetblue;
    }

    .row2 .title {
        display: flex;
        flex-direction: row;
        justify-content: space-between;
    }

    .row2 .pic-list {
        display: flex;
        flex-direction: row;
        justify-content: space-between;
    }

    .row2 .pic-list .big {
        background-color: aquamarine;
        height: 610px;
        width: 210px;
        margin-right: 20px;
    }

    .row2 .pic-list .right-list {
        /*background-color: antiquewhite;*/
        flex-grow: 1;
    }

    .row2 .pic-list .right-list .group {


        display: flex;
        flex-direction: row;
        justify-content: space-between;
        flex-wrap: wrap;
    }

    .row2 .pic-list .right-list .phone {
        margin-bottom: 10px;
        border: 1px solid red;
        width: 200px;
        height: 300px;
    }

    .course-list {
        display: flex;
        justify-content: space-between;
        flex-wrap: wrap;
    }

    .course-list .item {
        width: 24%;
        height: 100px;
        background-color: skyblue;
        margin-top: 15px;
    }

    // 如果最后一个元素,是第3个,右边距=一个位置 + 所有空白位置/3(有三个空白位置)
    .course-list .item:last-child:nth-child(4n - 1) {
        margin-right: calc(24% + 4% / 3);
    }

    // 如果最后一个元素,是第2个,右边距=两个位置 + 所有空白位置/3*2(有三个空白位置)
    .course-list .item:last-child:nth-child(4n - 2) {
        margin-right: calc(48% + 8% / 3);
    }
</style>
至此,结合以上的知识点,我们就可以来开发一个项目,但很多的页面按钮、标签、提示框等都需要自己手动,太费劲。
所以,接下来就要给大家的来聊一个UI框架 - ElementUI,他的内部提供了很多方便的样式和组件,可以加速我们开发。
8.ElementUI
Element,是有 饿了吗 团队开发一套为开发者、设计师和产品经理准备的基于 Vue 2.0 的组件库(也支持vue3.x)。
在他的基础上来开发,可以大大提升开发进度。
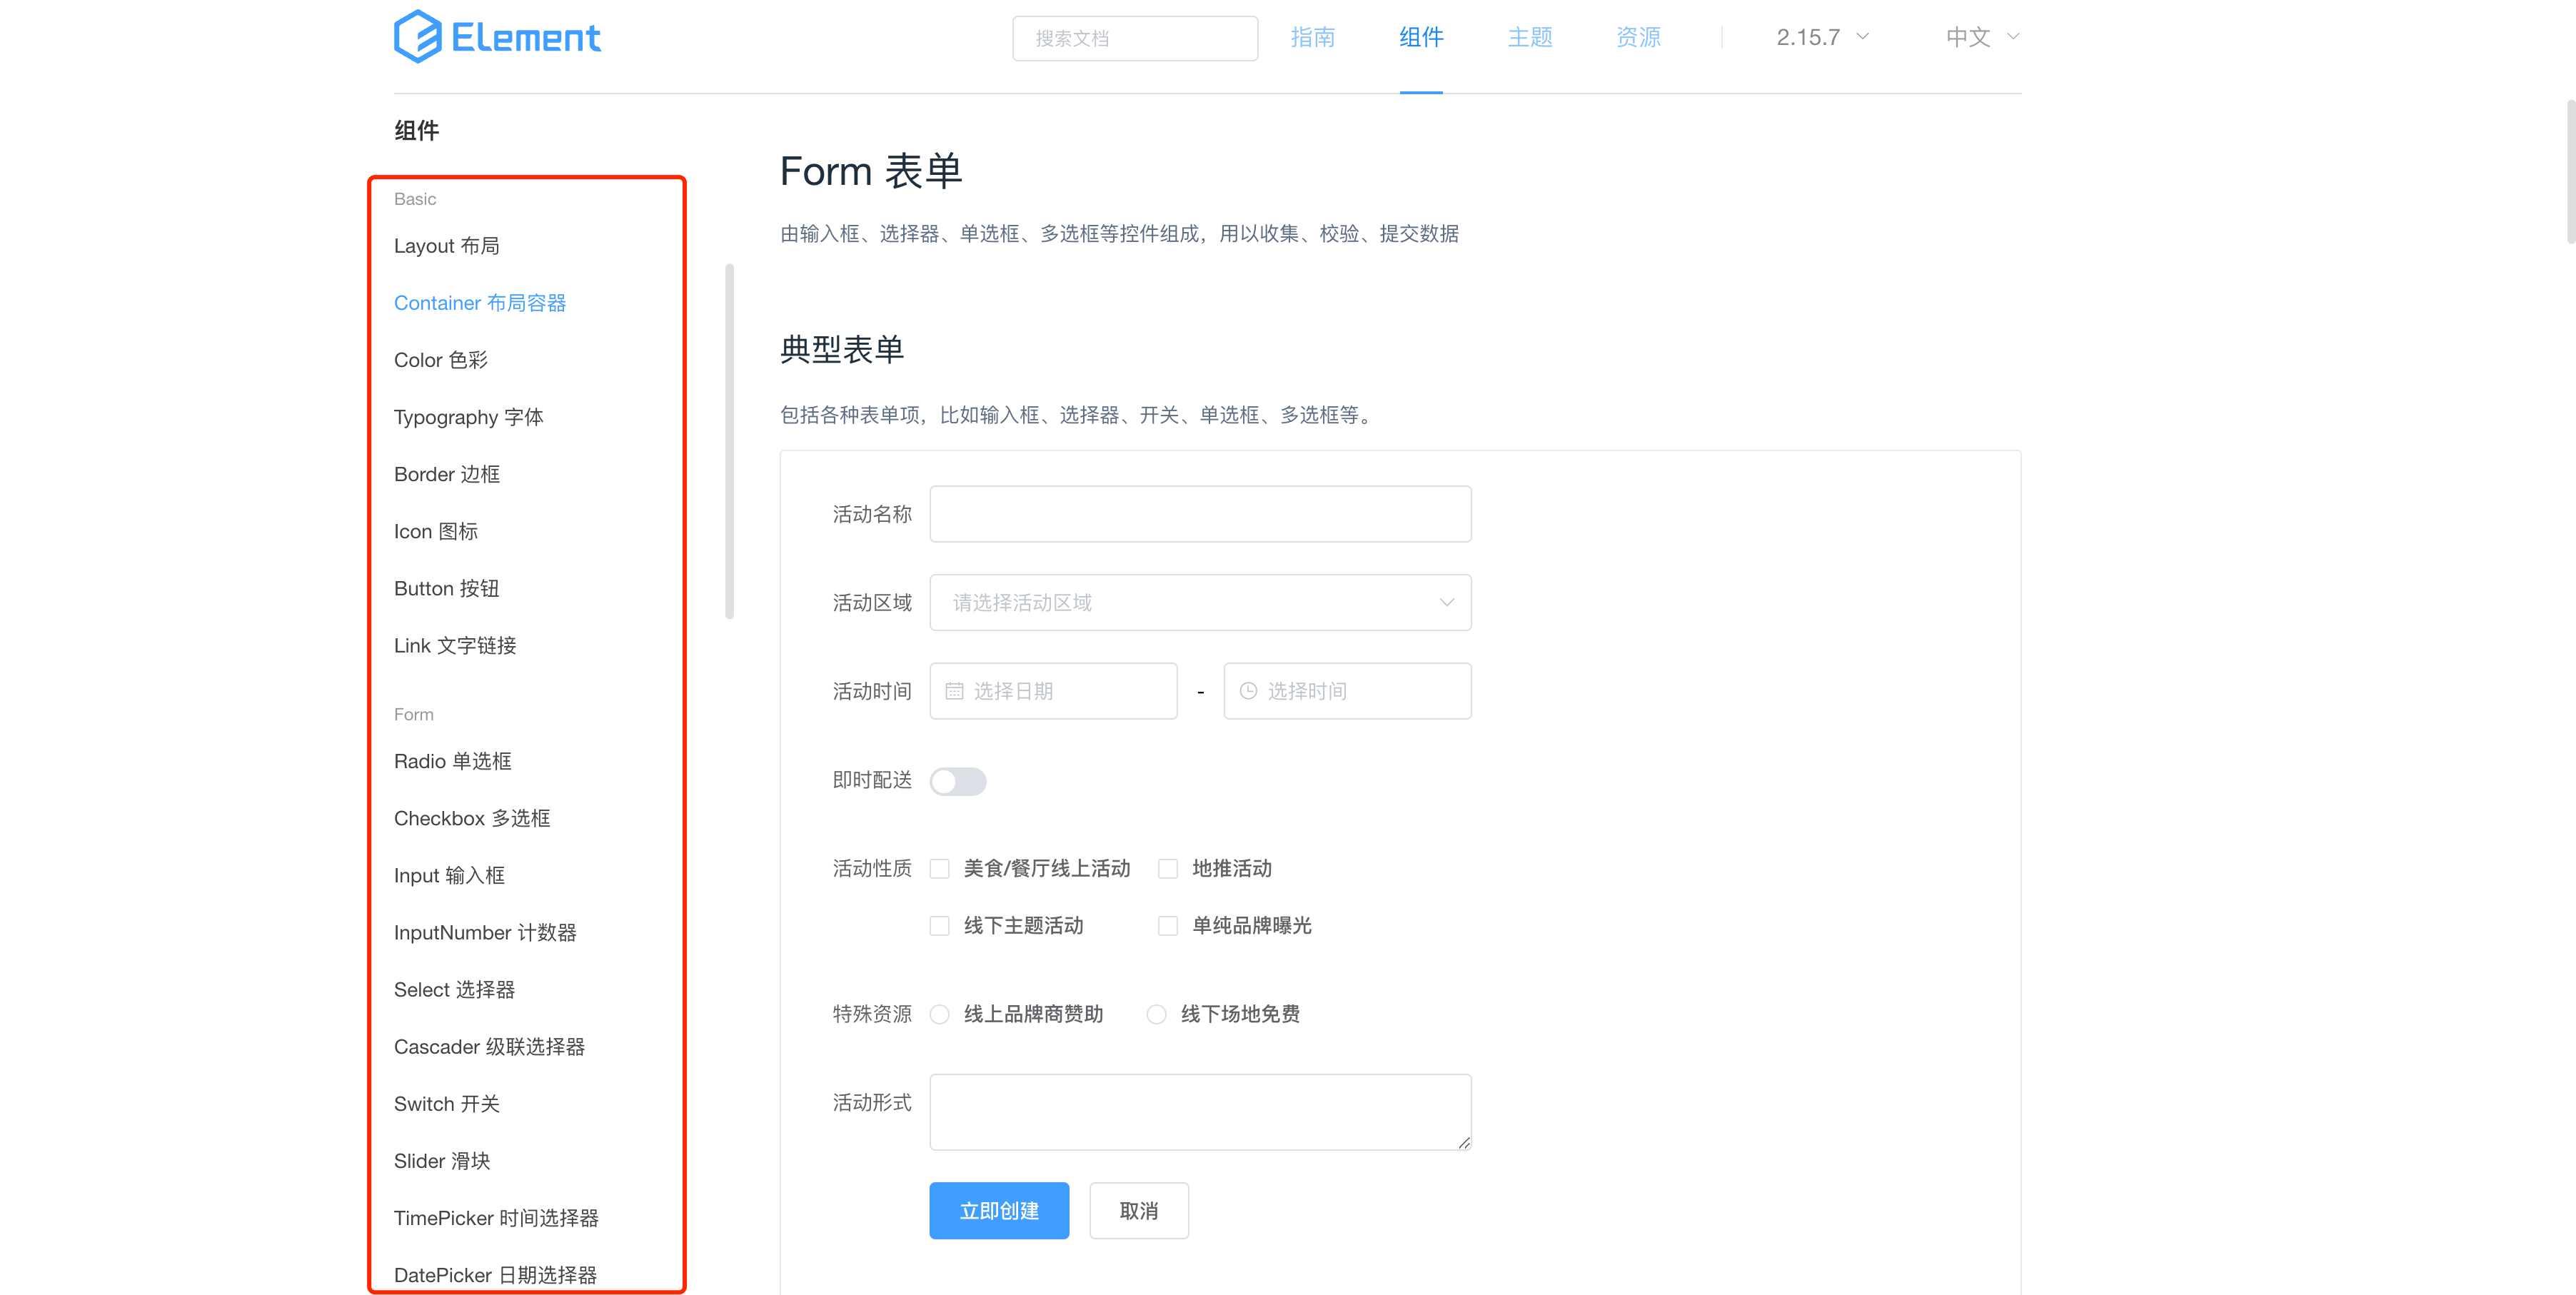
想要在项目中进行使用element-ui需要提前安装并引入。
8.1 引入
方式1:完整引入
- 安装
- 引入
import Vue from 'vue';
import ElementUI from 'element-ui';
import 'element-ui/lib/theme-chalk/index.css';
import App from './App.vue';

Vue.use(ElementUI);

new Vue({
    render: h => h(App),
}).$mount('#app')
- 在组件中使用
方式2:局部引入
- 安装
- 引入
import Vue from 'vue';
import { Button, Select } from 'element-ui';
import 'element-ui/lib/theme-chalk/index.css';
import App from './App.vue';


Vue.use(Button)
Vue.use(Select)

new Vue({
    render: h => h(App),
}).$mount('#app')
- 在组件中使用
完整组件名称:https://element.eleme.cn/#/zh-CN/component/quickstart
8.2 组件的使用
参见官方文档,在后续的项目开发中来应用并使用。